Setting Up Munki With OS X Yosemite Server
This is all assuming you’ve got Server.app set up and running.
If the Websites service in Server.app is running, turn it off first.
The first steps are to create the Munki repo in the location that Server 4 uses to store website data
mkdir /Library/Server/Web/Data/Sites/Default/repo
mkdir /Library/Server/Web/Data/Sites/Default/repo/catalogs
mkdir /Library/Server/Web/Data/Sites/Default/repo/pkgs
mkdir /Library/Server/Web/Data/Sites/Default/repo/pkgsinfo
mkdir /Library/Server/Web/Data/Sites/Default/repo/manifests
Change permissions to make sure it’s accessible
chmod -R a+rX /Library/Server/Web/Data/Sites/Default/repo
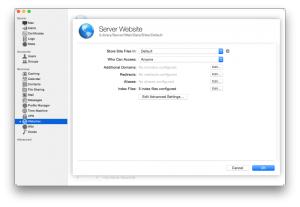
In the Server.app Websites pane, edit the “Server Website” (port 80) settings:
Next to “Redirects”, click “Edit…”, and remove the only redirect (which automatically redirects port 80 to port 443 traffic). It should look like this:
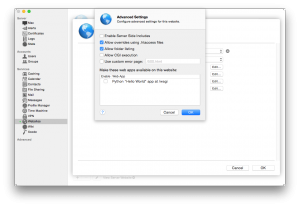
Next, click “Edit Advanced Settings” and check the box for “Allow folder listing” (just for now – it’s easier to visually test this way):
Turn the Websites service on.
Open up Safari, navigate to:
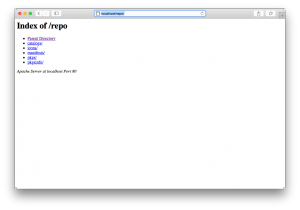
http://localhost/repo/
You should see a page like this:
If you can get to this point, you’ve done the website setup work. Now you can go to the next section:
https://github.com/munki/munki/wiki/Demonstration-Setup#populating-the-repo
Once you’ve populated the repo, you can set up a new manifest called “test_munki_client”. Follow the instructions exactly:
https://github.com/munki/munki/wiki/Demonstration-Setup#creating-a-client-manifest
Go through the Client Configuration section:
https://github.com/munki/munki/wiki/Demonstration-Setup#munki-client-configuration
Here, you need to do two things on your OS X client.
If you are testing this on the OS X Server itself (i.e. you are only using one machine total), do this:
sudo defaults write /Library/Preferences/ManagedInstalls SoftwareRepoURL "http://localhost/repo"
sudo defaults write /Library/Preferences/ManagedInstalls ClientIdentifier "test_munki_client"
If you are testing Munki on a different client machine from the server, do this
sudo defaults write /Library/Preferences/ManagedInstalls SoftwareRepoURL "http://ip_or_domain_name_of_server/repo"
sudo defaults write /Library/Preferences/ManagedInstalls ClientIdentifier "test_munki_client"
And then finally you can check to see if Munki behaves as you’d expect
sudo /usr/local/munki/managedsoftwareupdate -vv
munkiimport (import App from App Store)
munkiimport /Applications/Pixelmator.app --repo-path /Library/Server/Web/Data/Sites/Default/repo
bei python Troubles munkiimport –configure
/usr/local/munki/munkiimport --configure
als Pfad auf dem Server bitte file:///Library/Server/Web/Data/Sites/Default/ eingeben, ansonsten afp://munki.example.com/repo


